LightBoard Build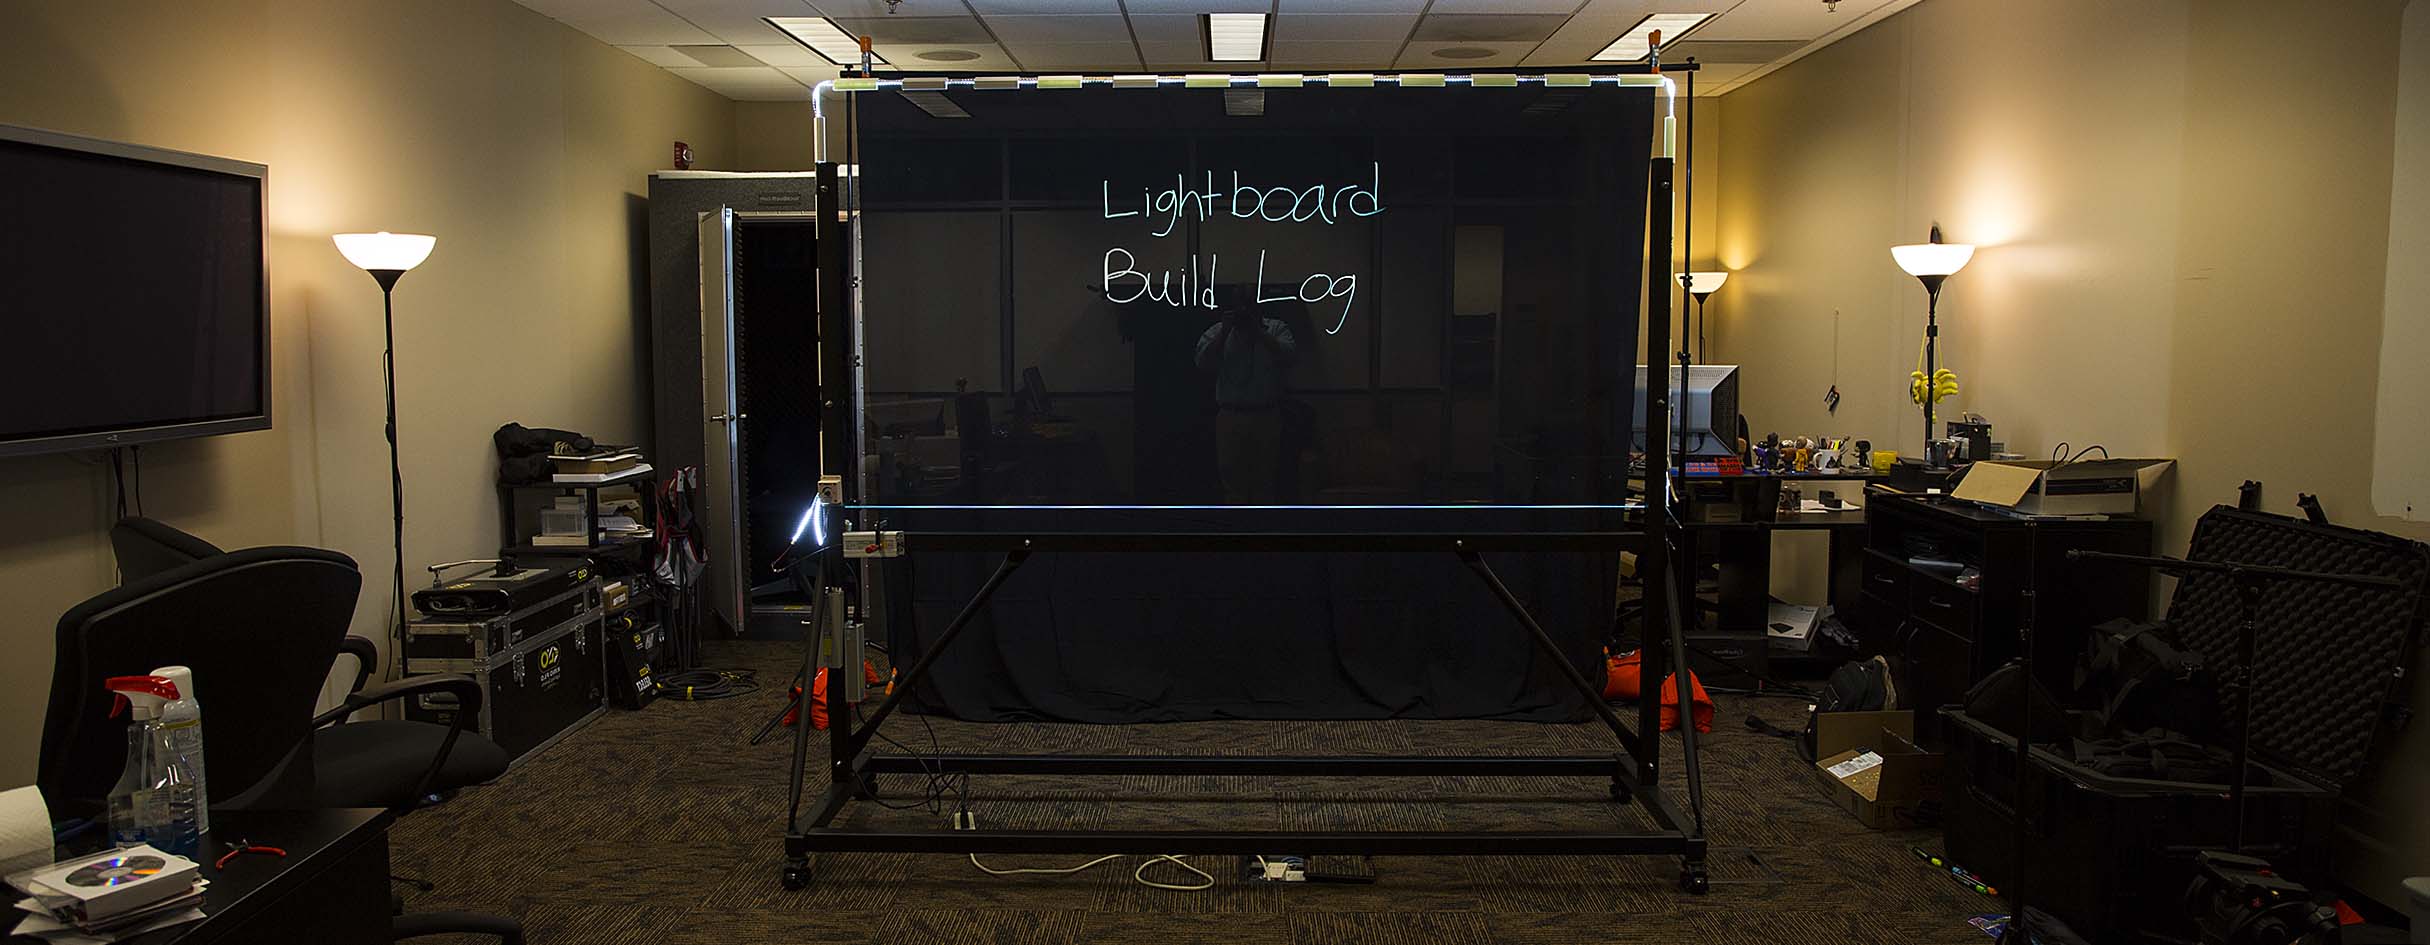
Need
Best Practices
Documents
- Frame Receipt
 Glass Dimensions
- Frame Instructions
- Lightboard Bill of Goods.pdf
- Bill of Goods.xlsx
- Glass Receipt.pdf
Tools needed
- Socket wrench set and adjustable wrench (assist with tightening bolts, the frame is very simple to put together with two (2) people)
- wire cutters/striper (for solder free LED connections)
- C clamps for attaching power supplies to frame (for a more permanent solution we plan to use self tapping screws)
- Dremel for adjusting 3D printed LED holders (we did the low resolution print of Dukes model)
- A clamps to keep backdrop in place on the stand
Best practices for setup/construction/use
- We spaced out our frame and glass order to ensure the frame arrived first and was ready for the glass delivery. For the glass delivery, we had four (4) people. Two people to hold the glass and the other two to help guide placing it on the stand-offs and tightening the safety.
- Test all of your power supplies and strips before attaching LEDs to the glass.
- Needle nose pliers help greatly when trying to run the LED strips through the 3D printed holder. We did a low resolution print of the model designed by Duke found here
Markers
We decided to stick with the Expo Dry Erase Neon set instead of liquid based neon markers. While the liquid chalk markers are much more vibrant and offer a wider selection of colors the amount of time required for cleaning between videos can require extra time compared to the dry erase markers that wipe away with a paper towel.
Cleaning
Cleaning the glass is a process. We saw good results with a dry erase first and then using Windex. Using only glass cleaner spray and paper towels did quickly fill the glass with lots of streaks and a hazy finish. In most cases, the camera will not see the streaks on the glass but over time it will show in your videos. For a crystal clear and thorough cleaning of the glass, we use a squeegee and foaming glass cleaner. For sessions with multiple videos, we do a quick dry erase with a paper towel and if needed small areas with Windex. Once the session or day is over, we do a full clean with the foaming spray and squeegee. The first time we used the foam spray it was day and night difference over just a paper towel and liquid cleaner.
Studio Space
The lightboard room and studio space is 32' x 17.5'. This includes a sound booth and two (2) desks. We have about 5' between the glass and the backdrop to ensure comfortable space for faculty to not feel cramped and for the light from the LEDs pointed away from the glass to sufficiently falloff so that the camera is not able to get an exposure on the muslin.
Backgrounds
Achieving clean black backgrounds in your video. If you have your lights/glass too close to the backdrop not only will faculty feel cramped but you raise the exposure on the cloth which will allow the camera to capture wrinkles in the backdrop as well as raise the amount of digital noise seen in the video. It is ok to get some spill from light sources but ideally it is best to keep that to a minimum. LED strips and fluorescent light sources tend to have short fall off compared to fresnel studio lights. The larger your source the softer the light and shorter falloff, LED panel lights for studio video will tend to have more spill and longer falloff because of how the bulbs are concentrated in one panel. Cinefoil is your best friend for controlling light spill. Our studio space is completely blacked out during recording to minimize ambient light. For majority of camera sensors, if your shadow detail (blacks) is underexposed enough it will render solid black instead of dark spaces with higher visibility of digital noise (grain). Depending on where the videos are hosted you will likely find that even with a high bitrate h.264 export during local playback you will achieve nice clean background but once it is compressed and hosted you will see pixelation in the background (this is due to streaming compression). Youtube has increased their streaming quality so for videos that are uploaded to YouTube or Vimeo you will see the closest to high quality from your original export.
Reflections
Reflections. Be careful about what is in your studio space as glass with a black background will pick up light sources and reflect them back to the camera. For cameras that have a LCD on a swivel, avoid flipping it forward if you are recording solo. For teleprompters, a circular polarizing filter on the camera and the screen will allow the reflection to disappear as you adjust the filter on the lens of the camera.
Lighting
For instructional videos, we use the method of under exposing the faculty member by about 1stop. This still makes for an engaging video with emphasis to keep the viewer focused on what is on the glass. For promotional videos, I have found that side lighting renders great results to match the exposure on the person with the text on glass. The one problem with side lighting to increase exposure on the person behind the glass means that they have to be more careful to not stand directly behind the text while writing as this makes it challenging to read. With a slightly underexposed person the text is easier to read when the person stands directly behind the content while they write. My exposure settings in our setup on a Sony NX5u are 0db f4.8 at 7700K (on a 5D3 with 24-70mm 1/60 f7.1 iso640 ~70mm)
Please check back for more tips and information about the construction of the Clayton State University Lightboard