SmartPrint Install
To self-install SmartPrint, select your platform below and follow the instructions. If you need help installing, please contact the Hub.
For Windows Users
- Download the SmartPrint installation file from the link below. Download SmartPrint for Windows 7/8/10
- Locate the downloaded installation file and double-click on the file to open it.
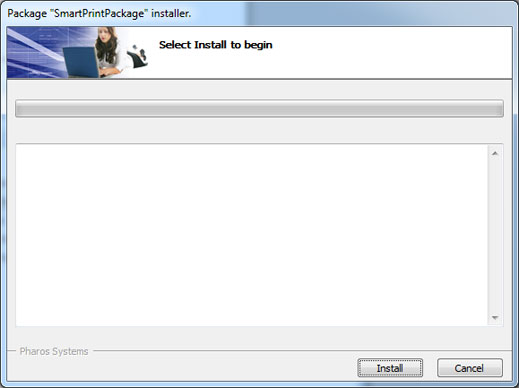
- The SmartPrint install window will display. Click on “Install” to begin the installation.
This may take several minutes to complete).
- Click “Finish” when the SmartPrint installation is complete. You are now ready to
print with SmartPrint.
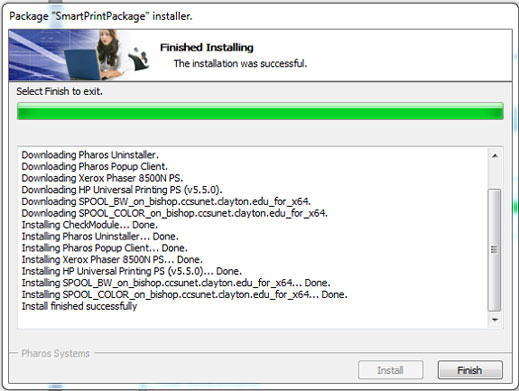
There should be two new printers installed on your computer named ”SmartPrintBW2008” and “SmartPrintColor2008”.
SmartPrint installation and printing support- If you have problems with the SmartPrint installation process, please contact The HUB by phone at (678) 466-HELP (4357) or in person at either of their two locations. The Service Counter is located in the University Center and Software Support is in the lower level of the Library. For assistance queuing or releasing a document to print, visit The LakerCard Center.
NOTICE to Mac users
Mac users running Monterey: the current SmartPrint download for MAC is not compatible with Monterey. Please contact the Hub at (678) 466-4357 or via TEAMS for assistance with installing a compatible version on your laptop.
For immediate printing needs, please visit the Library lower level to use the Galileo desktop computers.
For Mac Users
- Download the SmartPrint installation file from the link below. Download SmartPrint on OSX 10.6 or later
- Locate and double-click on downloaded file to mount it to your computer.
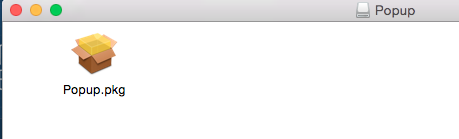
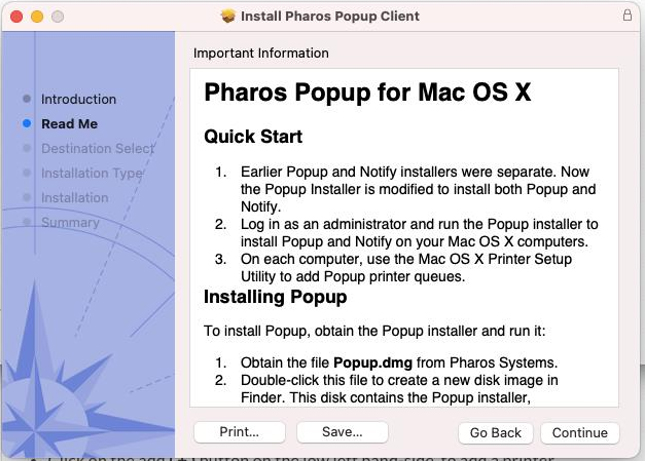
- Double-click on Popup.pkg to open the installation screen.
- Provide your administrative password for your computer when prompted.
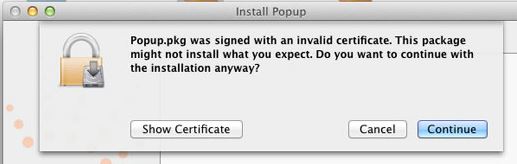
- Click Continue, then Continue again to progress through the Read Me page. Click the Install button to begin the installation and click Close to when the installation is complete. Note: If a prompt referring to an invalid certificate is displayed, click the Continue button.
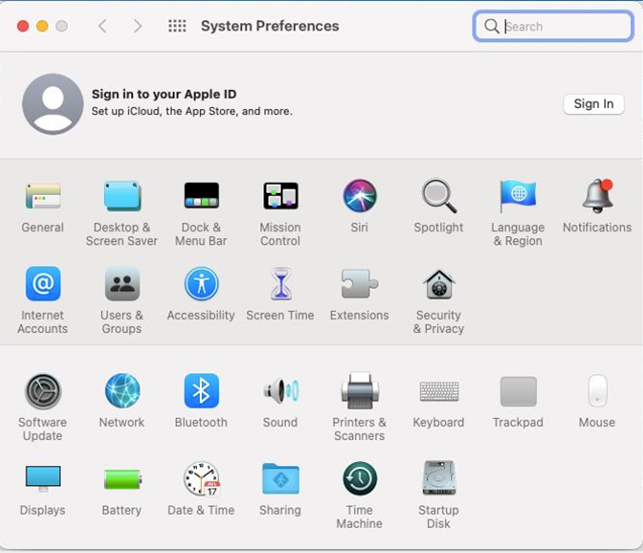
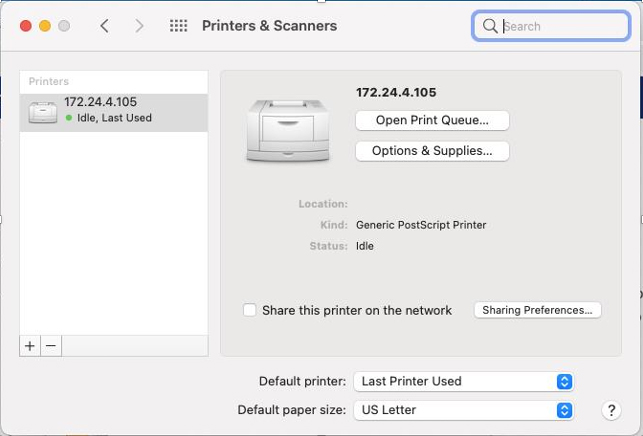
- Go to System Preferences in your Macbook.
- Click on Printers & Scanners.
- Click on the add ( + ) button on the low left hand-side to add a printer.
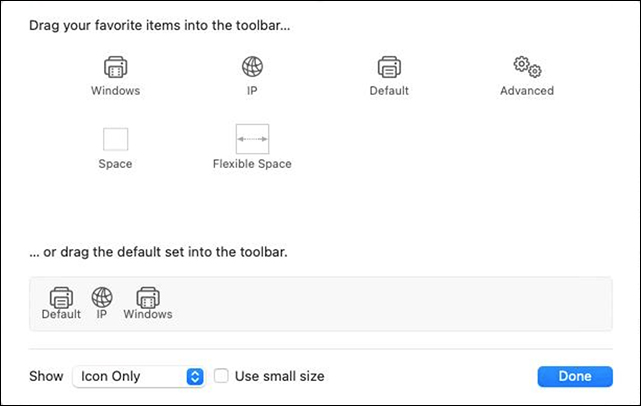
- There should be an Advanced gear button on the menu bar, but if you don't see it there you can right click on the bar, choose Customize Toolbar...
- Drag the Advanced gear icon to the menu bar.
- To add SmartPrintBW
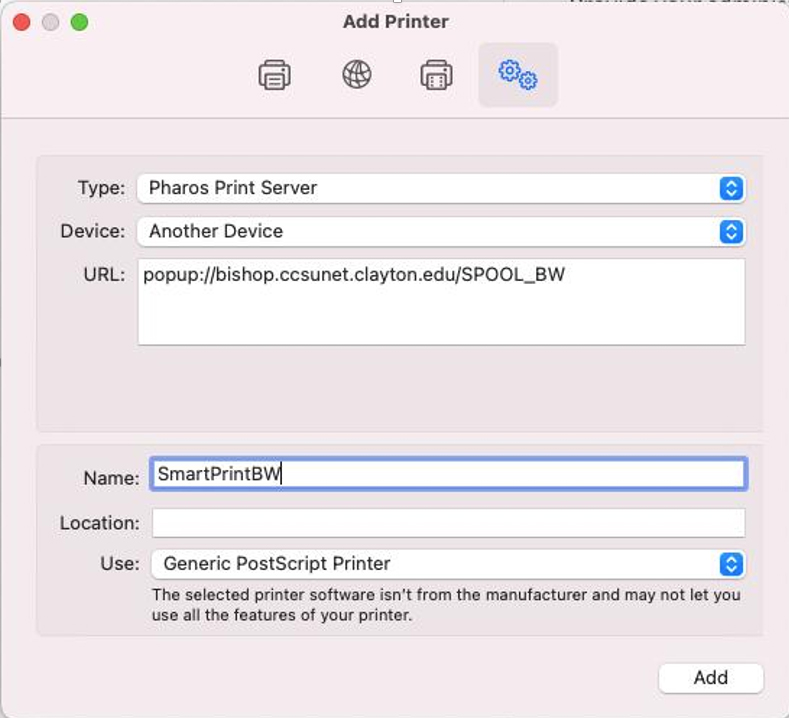
- Click on the Advanced gear to fill out the blanks follow the below: (you can copy and paste)
- Type: go down to Pharos Print Server
- URL: popup://bishop.ccsunet.clayton.edu/SPOOL_BW
- Name: change it to SmartPrintBW.
- Location: leave this blank
- Use: Generic PostScript Printer
- Your setting should look like the picture below:
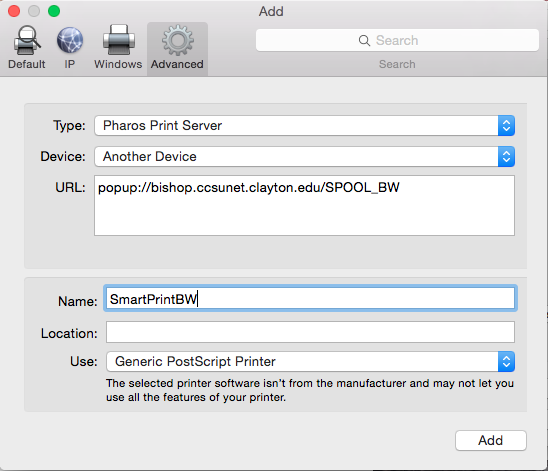
- Click Add button, then OK without mark on Duplex Printing Unit
- Click on the Advanced gear to fill out the blanks follow the below: (you can copy and paste)
- To add SmartPrintColor
- Click on add ( + ) button on the low left hand-side to add a printer.
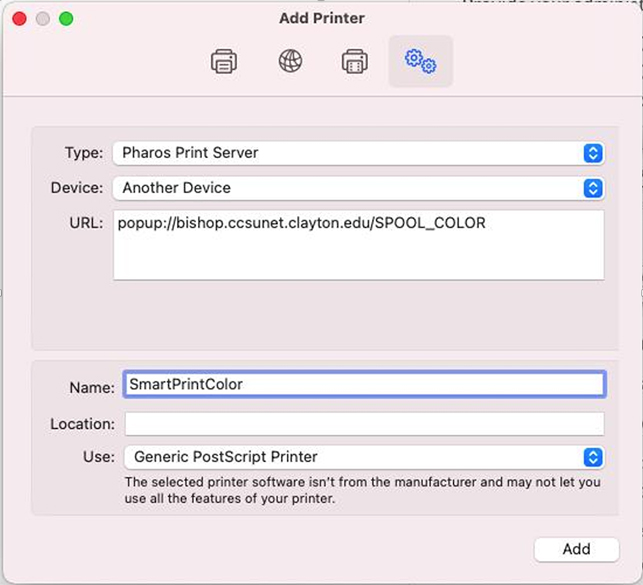
- Click on the Advanced gear to fill out the blanks follow the below: (you can copy and paste)
- Type: go down to Pharos Print Server
- URL: popup://bishop.ccsunet.clayton.edu/SPOOL_COLOR
- Name: change it to SmartPrintColor.
- Location: leave this blank
- Use: Generic PostScript Printer
- Your setting should look like the picture below:
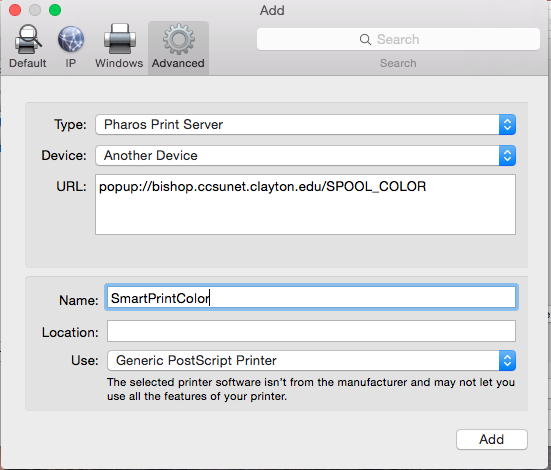
- Click Add button, then OK without mark on Duplex Printing Unit
For Mac Users
- Download the SmartPrint Installation file from this link: Download SmartPrint for OSX 10.6 or later, including Big Sur
- Locate and double-click on the downloaded file to mount it to your computer.
- Double-click on Popup.pkg to open the installation screen.
- Provide your administrative password for your computer when prompted.
- Go to System Preferences in your Macbook.
- Click on Printers & Scanners.
- Click on the add (+) button to add a printer.
- There should be an Advanced gear button on the menu bar, but if you don’t see it there you can right click on the bar, choose Customize Toolbar…
- Drag the Advanced gear icon to the menu bar.
- To add SmartPrintBW
- Click on the Advanced gear. To fill in the blanks, follow the instructions below:
- Type: go down to SmartPrintBW
- URL: popup://bishop.ccsunet.clayton.edu/SPOOL_BW
- Name: change it to SmartPrintBW
- Location: leave this blank
- Use: Generic PostScript Printer
- Your settings should look like the picture below:
- Click ADD button, then OK without mark on Duplex Printing Unit .
- To add SmartPrintColor
- Click on the Advanced gear. To fill in the blanks, follow the instructions below:
- Type: go down to SmartPrintColor
- URL: popup://bishop.ccsunet.clayton.edu/SPOOL_COLOR
- Name: change it to SmartPrintColor
- Location:leave this blank
- Use: Generic PostScript Printer
- Your settings should look like the picture below:
- Click ADD button, then OK without mark on Duplex Printing Unit
- Click on the Advanced gear. To fill in the blanks, follow the instructions below:
For Faculty and Staff Users
Konica Package for Arts & Sciences
In File Explorer, enter lochbox.clayton.edu, then select:
- PackageDistribution
- PublicPackages
- Printers
- AS_BIZHUB601